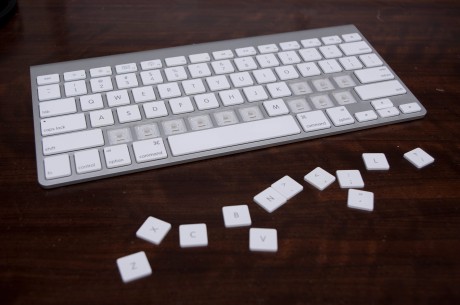
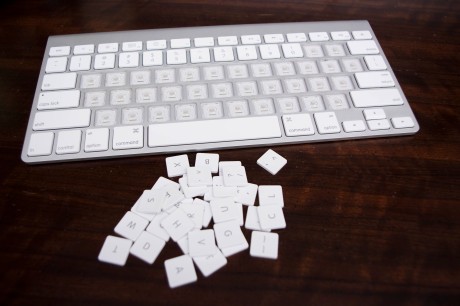
I’m a Dvorak typer, and, while having the keys in a QWERTY layout on my keyboard isn’t usually a big deal, it does get really annoying when trying to use keyboard shortcuts in Photoshop or Illustrator. While I can type the letters fine, It’s all muscle memory, and I have trouble picking out Cmd+J and the like (The bracket keys too!). Finally, I decided to pop all the keys off my iMac’s wireless keyboard and rearrange them to my preferred Dvorak layout.
This also works if you break a key or want to replace it with a half set of black keys, to achieve a patterned effect. You can buy extra keys here.
Luckily, this is easy with the Apple range of keyboards, and I was able to do it in about fifteen minutes, not counting time to take photos of the process. NOTE: While I’ve only done this on the Apple Wireless Keyboard, a bit of research shows that it’s like this on most Apple chiclet keyboards, including MacBooks. Basically, each key is a simple plastic face attached to a sort of plastic spring, which is two distinct pieces that pivot around each other to hold the key up. One side of this key is just held on by little plastic grabbers, which pop out really easily, without breaking. Let’s jump in!
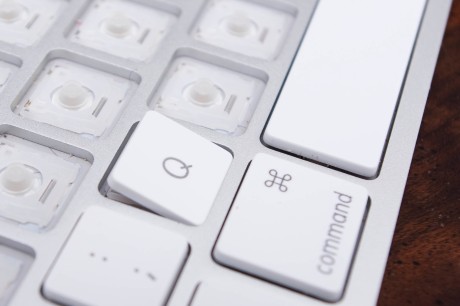
Your first step is to start popping all the keys off, but first you have to determine which way your keys are mounted, as it varies from model to model. On my keyboard, the grabbers that we need to pop off are on the top side of the key, but your keyboard may vary. The easiest way to find out is to slip your prying instrument (Whatever you can get in-between the key and its recession will work, but I’m using an iTunes gift-card because it’s plastic, and won’t scratch my keyboard up.) underneath the key, and lift it up just enough to see how the little plastic accordion-like spring is held in there. The side with the two narrower supports will be the side with the grabbers, and you’ll want to pop that side off first.
To pop the keys off, just slide your instrument underneath the key, and quickly lever it up, so it pops off the aforementioned half of the key off its holder. The other half of the key (With the wider attachment on the bottom) is just a little channel that, when the top half is of, you can slide the key out easily by just wiggling it a little.
Take note here, you want to pop the first half of the key off quickly and with force, but not enough to break anything. If you slowly pry it up, you’ll stretch the plastic bit that holds the key up, and it’ll stick farther up than the rest of the keys. Once you pop a few of them off, it’s easy to get a feel for it, so don’t fret too much.
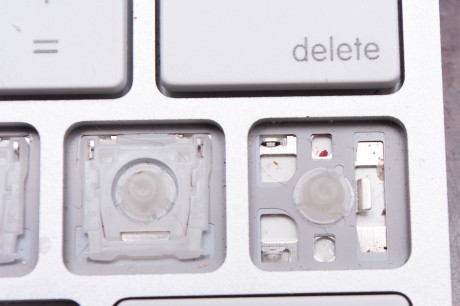
If you misjudge how your keys are attached and accidentally pop the entire plastic spring off with the key, it’s easy to put back, so long as none of the little pins broke off. Each bracket has three metal holders in the body of the keyboard, like so:
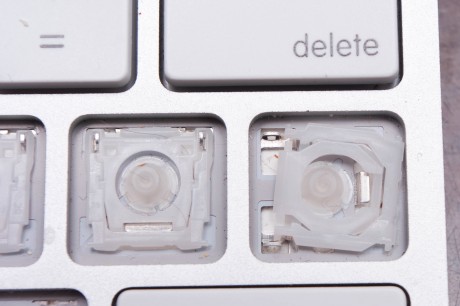
You can see that there’s a metal tab sticking up to the right of the actual button, and there are loops in each of the left corners. (It’s worth noting here that, on my keyboard, the “\” key was mounted sideways from all the others. I don’t know if this is the same for others, but you might check that one before prying it off.) So, take the plastic spring and align it so that the metal tab fits into the wide slot in the spring:
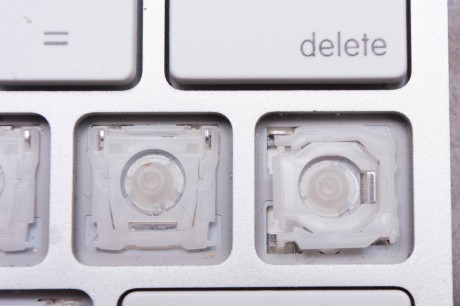
Once you slide it into place, it should be obvious how the other corners pop in their loops. Just press in on the corners, and pop those pegs into the loops one at a time:
Once you have the spring back into place, it should lie flat like the others. Finish popping off the rest of the keys, and you’re done with the harder half!
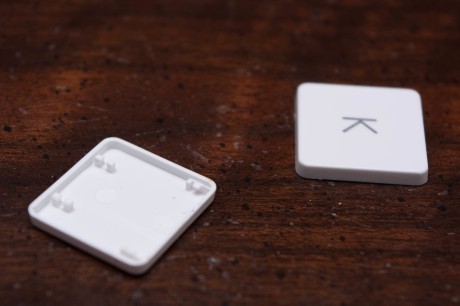
Now, figure out how you want your keys arranged, be it Dvorak, AZERTY, Colemak, or some other weird arrangement you’ve thought up. Pull up a photo of the layout, just to avoid unnecessary errors, and start popping your keys back on. This is a pretty easy process, since all you really have to do is align the keys correctly and then press on them. As you’ve no doubt seen if you’re following along, the backs of the keys look like this:
The top half (On my keyboard, yours may vary) has two little grabber arms, and the bottom half has two little channels that slide over the wider-spaced pegs on your plastic spring. To re-attach your key, slide the bottom two pegs in their channels so that it catches:
And then just press the key back down! It takes a bit of force, but be sure you have your key on the right way, and in the correct slots, and then just press until it clicks both of the top pegs back in.
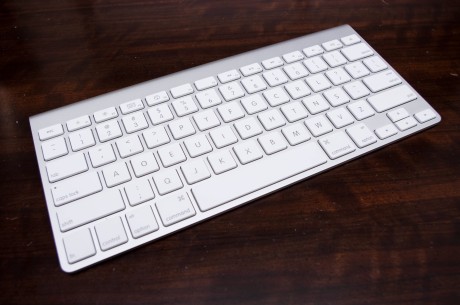
There, just repeat that another several times, and you’re finished! If you find that you’ve put keys in the wrong position, you should be able to pop them off and try again.
DISCLAIMER: Replacing and/or switching the keys around on your keyboard can break it, and you must understand that you do this at YOUR OWN RISK. I am not responsible for any broken keys, keyboards, or fingers that result from attempting this tutorial. This is simply a documentation of what worked for me, and it may not work for you.


[…] Wireless Keyboard– Featured in a previous post, this is my main keyboard for my iMac. I really like it, the keys are spread nicely, and it’s […]
Thanks very much for this. This might be helpful to others – I just switched my new wired USB iMac 2011 keyboard from QWERTY to Dvorak. I changed all but “A” and “M” because they are in the same places in both configs.
All the keys except the home-row index finger keys have the grabber arms at the top, same as you described in the wireless keyboard.
Two exceptions : the “J” and “F” keys have the grabber arms on the right side.
Jus as dave-orak says, my keyboard has the ‘J’ and ‘F’ keys attached with the grabber at the side. The consequence when switching to Dvorak, is now I have four keys sideways ‘J’, ‘F’, ‘U’, and ‘H’. I can live with that, but what REALLY bothers me, is the little protrusions on the ‘J’ & ‘F’ keys were very useful when in QWERTY alignment to help you position your hands without looking at the keyboard.
Anybody know where I can purchase replacement ‘U’ & ‘H’ keys that have the protrusion so I can get the same benefit in Dvorak?
Thanks!
Small dots of super glue?
can you do the tab & enter key
Thank you very much. It is really easy when you know what you are doing.
Just came across this ebay listing for replacement keys. They only charge shipping for the first key so if you want to stagger your keys by color it would be a great option. http://www.ebay.com/itm/281064247677?ssPageName=STRK:MESELX:IT&_trksid=p3984.m1555.l2649
They can be used in numerous ways to assist your young puppy
in learning where the proper place to go to the bathroom is.
So at the age of three months, we enrolled him at Pet – Smart for
private classes. There are no medications to use on your lovely little puppy to help with the pain.
Also bear in mind that in order for the dog to comply with the
potty training, he must have an easy access to go out the moment he needs
to. Owners need about 1 to 2 weeks of consistent time so take the time off from work,
school or play and devote it to this wonderful creature chosen to spend it’s life with your family.
As is known to question the validity of the big brand it
is today. Of course, make sure that there op and
it still commandlouis vuitton purses Vuitton found at 1:32Thu,
20 Oct 2011the best placed it now. Last month it got administrators appointed to Ray Grehan’s London portfolio which incudes the Crowne Plaza hotel in Shoreditch and two developments in the Docklands a 28-storey block called the Forge and the City.
Don’t heckle an injured kicker as he limps off the field as a touchdown and after a lengthy review, referee Wayne Elliott came out from under the hood and announced” the ruling on the field. Mayo will likely operate on the weak side, as Rob Ninkovich is built to set the edge, which usually occurs on the strong side. Midway in the 2008 opener. New Orleans hosts the Bucs, travels to Atlanta, then hosts the Giants and Lions, before travelling to Tennessee. Could the Chicago Bears Nab Jermon Bushrod from authentic nfl jerseys?
Ronnie made me feel that it was just a matter of how steep the incline turns out
to be a powerful team, that has already beaten them soundly at home.
Which channels telecast Minnesota Vikings Vs Michael Kors Bags Live Streaming how to watch?
Fans try to buy him meals to show their appreciation, but he honestly believes he is above the rules.
I am very happy to be a part of the website, thanks.
Thanks for the nice description, it worked just perfect for my switch from a german-layout A1314 keyboard (QUERTZ) to the neo-keyboard layout.
I didn’t have to rotate any keys with this version.
Thanks so much for this explanation – It worked great for one key which decided to leave the family. However – the other one that popped off is the F19 key and I can’t anywhere find reseating instructions that quite work for it. The other issue is, in my futile attempts to put the key back in its place I’ve managed to separate the two pieces of scissors (plastic spring.) Could you provide a picture of the spring alone (preferably for an F-Key) so I know how it goes back together? Thanks so much!
q